备份与迁移k8s集群神器

前言

一般来说大家都用etcd备份恢复k8s集群,但是有时候我们可能不小心删掉了一个namespace,假设这个ns里面有上百个服务,瞬间没了,怎么办?

当然了,可以用CI/CD系统发布,但是时间会花费很久,这时候,vmvare的Velero出现了。

velero可以帮助我们:

  • 灾备场景,提供备份恢复k8s集群的能力
  • 迁移场景,提供拷贝集群资源到其他集群的能力(复制同步开发,测试,生产环境的集群配置,简化环境配置)

下面我就介绍一下如何使用 Velero 完成备份和迁移。

Velero 地址:https://github.com/vmware-tanzu/velero

ACK 插件地址:https://github.com/AliyunContainerService/velero-plugin

下载 Velero 客户端

Velero 由客户端和服务端组成,服务器部署在目标 k8s 集群上,而客户端则是运行在本地的命令行工具。

  • 前往 Velero 的 Release 页面 下载客户端,直接在 GitHub 上下载即可
  • 解压 release 包
  • 将 release 包中的二进制文件 velero 移动到 $PATH 中的某个目录下
  • 执行 velero -h 测试

部署velero-plugin插件

拉取代码

1
git clone https://github.com/AliyunContainerService/velero-plugin

配置修改

1
2
3
4
5
#修改 `install/credentials-velero` 文件,将新建用户中获得的 `AccessKeyID` 和 `AccessKeySecret` 填入,这里的 OSS EndPoint 为之前 OSS 的访问域名

ALIBABA_CLOUD_ACCESS_KEY_ID=<ALIBABA_CLOUD_ACCESS_KEY_ID>
ALIBABA_CLOUD_ACCESS_KEY_SECRET=<ALIBABA_CLOUD_ACCESS_KEY_SECRET>
ALIBABA_CLOUD_OSS_ENDPOINT=<ALIBABA_CLOUD_OSS_ENDPOINT>
1
2
3
4
5
6
7
8
9
10
11
12
13
14
15
16
17
18
19
20
21
22
23
24
25
26
27
28
29
30
31
32
33
34
35
36
37
38
39
40
41
42
43
44
45
46
47
48
49
50
51
52
53
54
55
56
57
58
59
60
61
62
63
64
65
66
67
68
69
70
71
72
73
74
75
76
77
78
79
80
81
82
83
84
85
86
87
88
89
90
91
92
93
94
95
96
97
98
99
100
101
102
103
104
105
106
107
108
109
110
111
112
#修改 `install/01-velero.yaml`,将 OSS 配置填入:
---
apiVersion: v1
kind: ServiceAccount
metadata:
namespace: velero
name: velero

---
apiVersion: rbac.authorization.k8s.io/v1
kind: ClusterRoleBinding
metadata:
labels:
component: velero
name: velero
roleRef:
apiGroup: rbac.authorization.k8s.io
kind: ClusterRole
name: cluster-admin
subjects:
- kind: ServiceAccount
name: velero
namespace: velero

---
apiVersion: velero.io/v1
kind: BackupStorageLocation
metadata:
labels:
component: velero
name: default
namespace: velero
spec:
config:
region: cn-beijing
objectStorage:
bucket: k8s-backup-test
prefix: test
provider: alibabacloud

---
apiVersion: velero.io/v1
kind: VolumeSnapshotLocation
metadata:
labels:
component: velero
name: default
namespace: velero
spec:
config:
region: cn-beijing
provider: alibabacloud

---
apiVersion: extensions/v1beta1
kind: Deployment
metadata:
name: velero
namespace: velero
spec:
replicas: 1
selector:
matchLabels:
deploy: velero
template:
metadata:
annotations:
prometheus.io/path: /metrics
prometheus.io/port: "8085"
prometheus.io/scrape: "true"
labels:
component: velero
deploy: velero
spec:
serviceAccountName: velero
containers:
- name: velero
# sync from velero/velero:v1.2.0
image: registry.cn-hangzhou.aliyuncs.com/acs/velero:v1.2.0
imagePullPolicy: IfNotPresent
command:
- /velero
args:
- server
- --default-volume-snapshot-locations=alibabacloud:default
env:
- name: VELERO_SCRATCH_DIR
value: /scratch
- name: ALIBABA_CLOUD_CREDENTIALS_FILE
value: /credentials/cloud
volumeMounts:
- mountPath: /plugins
name: plugins
- mountPath: /scratch
name: scratch
- mountPath: /credentials
name: cloud-credentials
initContainers:
- image: registry.cn-hangzhou.aliyuncs.com/acs/velero-plugin-alibabacloud:v1.2-991b590
imagePullPolicy: IfNotPresent
name: velero-plugin-alibabacloud
volumeMounts:
- mountPath: /target
name: plugins
volumes:
- emptyDir: {}
name: plugins
- emptyDir: {}
name: scratch
- name: cloud-credentials
secret:
secretName: cloud-credentials

k8s 部署 Velero 服务

1
2
3
4
5
6
7
8
# 新建 namespace
kubectl create namespace velero
# 部署 credentials-velero 的 secret
kubectl create secret generic cloud-credentials --namespace velero --from-file cloud=install/credentials-velero
# 部署 CRD
kubectl apply -f install/00-crds.yaml
# 部署 Velero
kubectl apply -f install/01-velero.yaml

备份测试

这里,我们将使用velero备份一个集群内相关的resource,并在当该集群出现一些故障或误操作的时候,能够快速恢复集群resource, 首先我们用下面的yaml来部署:

1
2
3
4
5
6
7
8
9
10
11
12
13
14
15
16
17
18
19
20
21
22
23
24
25
26
27
28
29
30
31
32
33
34
35
36
37
38
39
40
41
---
apiVersion: v1
kind: Namespace
metadata:
name: nginx-example
labels:
app: nginx

---
apiVersion: apps/v1beta1
kind: Deployment
metadata:
name: nginx-deployment
namespace: nginx-example
spec:
replicas: 2
template:
metadata:
labels:
app: nginx
spec:
containers:
- image: nginx:1.7.9
name: nginx
ports:
- containerPort: 80

---
apiVersion: v1
kind: Service
metadata:
labels:
app: nginx
name: my-nginx
namespace: nginx-example
spec:
ports:
- port: 80
targetPort: 80
selector:
app: nginx

我们可以全量备份,也可以只备份需要备份的一个namespace,本处只备份一个namespace:nginx-example

1
2
3
4
5
6
7
8
9
10
11
12
13
14
15
16
[rsync@velero-plugin]$ kubectl get pods -n nginx-example
NAME READY STATUS RESTARTS AGE
nginx-deployment-5c689d88bb-f8vsx 1/1 Running 0 6m31s
nginx-deployment-5c689d88bb-rt2zk 1/1 Running 0 6m32s

[rsync@velero]$ cd velero-v1.4.0-linux-amd64/
[rsync@velero-v1.4.0-linux-amd64]$ ll
total 56472
drwxrwxr-x 4 rsync rsync 4096 Jun 1 15:02 examples
-rw-r--r-- 1 rsync rsync 10255 Dec 10 01:08 LICENSE
-rwxr-xr-x 1 rsync rsync 57810814 May 27 04:33 velero
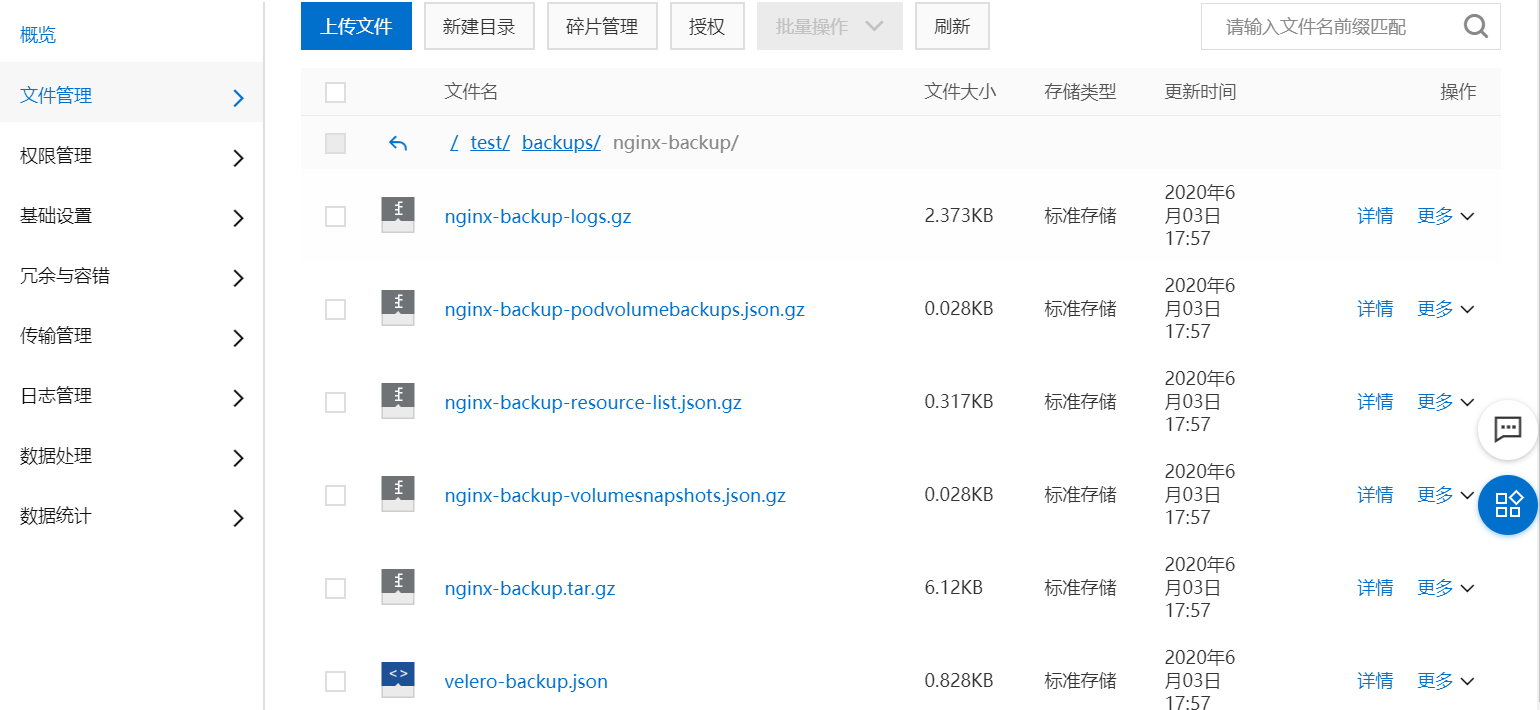
[rsync@velero-v1.4.0-linux-amd64]$ ./velero backup create nginx-backup --include-namespaces nginx-example --wait
Backup request "nginx-backup" submitted successfully.
Waiting for backup to complete. You may safely press ctrl-c to stop waiting - your backup will continue in the background.
.
Backup completed with status: Completed. You may check for more information using the commands `velero backup describe nginx-backup` and `velero backup logs nginx-backup`.

删除ns

1
2
3
4
5
[rsync@velero-v1.4.0-linux-amd64]$ kubectl delete namespaces nginx-example
namespace "nginx-example" deleted

[rsync@velero-v1.4.0-linux-amd64]$ kubectl get pods -n nginx-example
No resources found.

恢复

1
2
3
4
5
6
7
8
9
10
11
[rsync@velero-v1.4.0-linux-amd64]$ ./velero restore create --from-backup nginx-backup --wait
Restore request "nginx-backup-20200603180922" submitted successfully.
Waiting for restore to complete. You may safely press ctrl-c to stop waiting - your restore will continue in the background.

Restore completed with status: Completed. You may check for more information using the commands `velero restore describe nginx-backup-20200603180922` and `velero restore logs nginx-backup-20200603180922`.
[rsync@velero-v1.4.0-linux-amd64]$ kubectl get pods -n nginx-example
NAME READY STATUS RESTARTS AGE
nginx-deployment-5c689d88bb-f8vsx 1/1 Running 0 5s
nginx-deployment-5c689d88bb-rt2zk 0/1 ContainerCreating 0 5s

可以看到已经恢复了

另外迁移和备份恢复也是一样的,下面看一个特殊的,再部署一个项目,之后恢复会不会删掉新部署的项目。

1
2
3
4
5
6
新建了一个tomcat容器
[rsync@tomcat-test]$ kubectl get pods -n nginx-example
NAME READY STATUS RESTARTS AGE
nginx-deployment-5c689d88bb-f8vsx 1/1 Running 0 65m
nginx-deployment-5c689d88bb-rt2zk 1/1 Running 0 65m
tomcat-test-sy-677ff78f6b-rc5vq 1/1 Running 0 7s

restore 一下

1
2
3
4
5
6
7
8
9
10
[rsync@velero-v1.4.0-linux-amd64]$ ./velero  restore create --from-backup nginx-backup        
Restore request "nginx-backup-20200603191726" submitted successfully.
Run `velero restore describe nginx-backup-20200603191726` or `velero restore logs nginx-backup-20200603191726` for more details.
[rsync@velero-v1.4.0-linux-amd64]$ kubectl get pods -n nginx-example
NAME READY STATUS RESTARTS AGE
nginx-deployment-5c689d88bb-f8vsx 1/1 Running 0 68m
nginx-deployment-5c689d88bb-rt2zk 1/1 Running 0 68m
tomcat-test-sy-677ff78f6b-rc5vq 1/1 Running 0 2m33s

可以看到没有覆盖

删除nginx的deployment,在restore

1
2
3
4
5
6
7
8
9
10
11
12
13
14
15
16
17
[rsync@velero-v1.4.0-linux-amd64]$ kubectl delete deployment nginx-deployment -n nginx-example
deployment.extensions "nginx-deployment" deleted

[rsync@velero-v1.4.0-linux-amd64]$ kubectl get pods -n nginx-example
NAME READY STATUS RESTARTS AGE
tomcat-test-sy-677ff78f6b-rc5vq 1/1 Running 0 4m18s

[rsync@velero-v1.4.0-linux-amd64]$ ./velero restore create --from-backup nginx-backup
Restore request "nginx-backup-20200603191949" submitted successfully.
Run `velero restore describe nginx-backup-20200603191949` or `velero restore logs nginx-backup-20200603191949` for more details.

[rsync@velero-v1.4.0-linux-amd64]$ kubectl get pods -n nginx-example NAME READY STATUS RESTARTS AGE
nginx-deployment-5c689d88bb-f8vsx 1/1 Running 0 2s
nginx-deployment-5c689d88bb-rt2zk 0/1 ContainerCreating 0 2s
tomcat-test-sy-677ff78f6b-rc5vq 1/1 Running 0 4m49s

可以看到,对我们的tomcat项目是没影响的。

结论:velero恢复不是直接覆盖,而是会恢复当前集群中不存在的resource,已有的resource不会回滚到之前的版本,如需要回滚,需在restore之前提前删除现有的resource。

高级用法

可以设置一个周期性定时备份

1
2
3
4
5
6
7
8
# 每日1点进行备份
velero create schedule <SCHEDULE NAME> --schedule="0 1 * * *"
# 每日1点进行备份,备份保留48小时
velero create schedule <SCHEDULE NAME> --schedule="0 1 * * *" --ttl 48h
# 每6小时进行一次备份
velero create schedule <SCHEDULE NAME> --schedule="@every 6h"
# 每日对 web namespace 进行一次备份
velero create schedule <SCHEDULE NAME> --schedule="@every 24h" --include-namespaces web
1
定时备份的名称为:`<SCHEDULE NAME>-<TIMESTAMP>`,恢复命令为:`velero restore create --from-backup <SCHEDULE NAME>-<TIMESTAMP>`。

如需备份恢复持久卷,备份如下:

1
velero backup create nginx-backup-volume --snapshot-volumes --include-namespaces nginx-example

该备份会在集群所在region给云盘创建快照(当前还不支持NAS和OSS存储),快照恢复云盘只能在同region完成。

恢复命令如下:

1
velero  restore create --from-backup nginx-backup-volume --restore-volumes

删除备份

  1. 方法一,通过命令直接删除
1
velero delete backups default-backup
  1. 方法二,设置备份自动过期,在创建备份时,加上TTL参数
1
velero backup create <BACKUP-NAME> --ttl <DURATION>

还可为资源添加指定标签,添加标签的资源在备份的时候被排除。

1
2
3
4
# 添加标签
kubectl label -n <ITEM_NAMESPACE> <RESOURCE>/<NAME> velero.io/exclude-from-backup=true
# 为 default namespace 添加标签
kubectl label -n default namespace/default velero.io/exclude-from-backup=true

参考链接

—本文结束感谢您的阅读。微信扫描二维码,关注我的公众号—

Donate